The Efficiency of High-Protein Slow Cooker Lasagna
**The Efficacy of High-Protein Slow Cooker Lasagna**
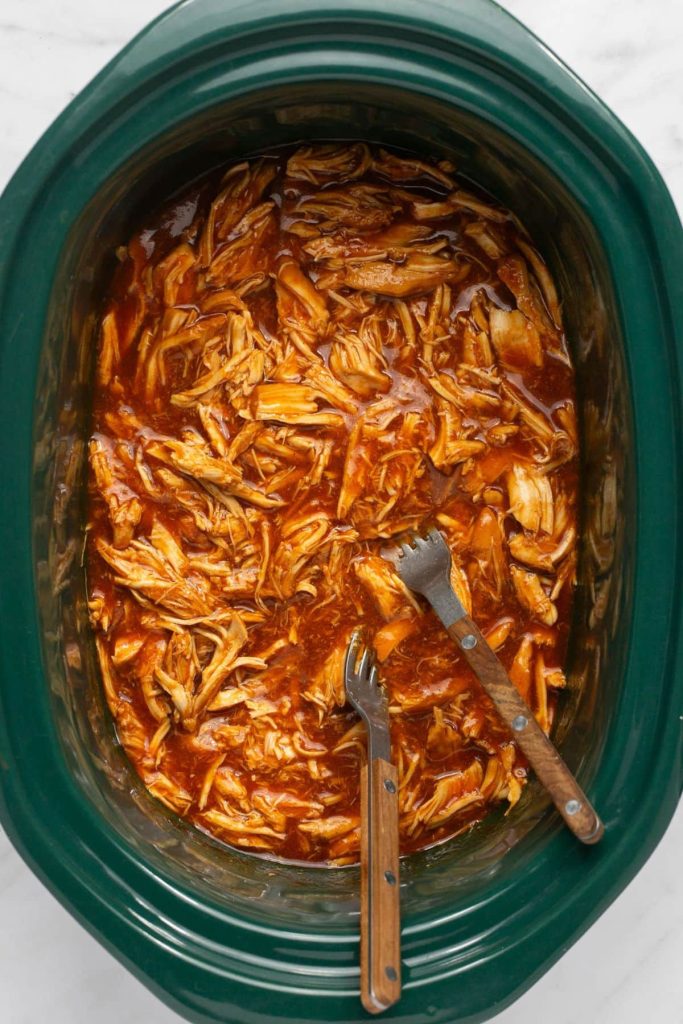
Lasagna, an iconic Italian meal, has long been a favorite in numerous homes for its deep flavors and delightful layers of pasta, cheese, and sauce. Yet, with the rising emphasis on health and nutrition, conventional recipes are being revised to align with dietary requirements. One such revision is the high-protein slow cooker lasagna, which merges convenience with health advantages. This article examines the efficacy of this dish in fulfilling dietary objectives and its influence on well-being.
**Health Advantages**
1. **Boosted Protein Consumption**: Protein is vital for muscle repair, development, and overall bodily functions. High-protein lasagna usually includes components like lean ground beef, turkey, or plant-based proteins such as lentils or tofu. Additionally, substituting cottage cheese or Greek yogurt for ricotta can elevate the protein levels.
2. **Well-Rounded Macronutrients**: By modifying the classic recipe, high-protein lasagna can provide a more well-balanced macronutrient profile. This equilibrium assists in sustaining energy levels and can facilitate weight management by promoting a sense of fullness.
3. **Abundant in Micronutrients**: Adding vegetables like spinach, zucchini, or bell peppers not only improves taste but also boosts the intake of essential vitamins and minerals. These nutrients are vital for sustaining immune health and overall wellness.
**Convenience and Preparation Method**
1. **Advantages of the Slow Cooker**: The slow cooker technique is celebrated for its ease. It allows for a hands-off culinary experience, perfect for those with busy lifestyles. Ingredients can be prepped ahead of time, and the slow cooking method enhances flavors while maintaining nutrients.
2. **Efficiency in Time**: While traditional lasagna demands lengthy preparation and supervision, the slow cooker variant streamlines the method. This approach is especially beneficial for individuals wanting a nutritious meal without spending countless hours in the kitchen.
**Health Considerations**
1. **Weight Control**: High-protein diets are frequently linked to weight loss and management due to their capacity to elevate feelings of fullness. Slow cooker lasagna, enriched with protein, can serve as a filling meal option that aids in appetite regulation.
2. **Muscle Preservation**: For those actively participating in fitness routines, preserving muscle mass is vital. The protein-dense nature of this lasagna supports muscle recovery and growth, making it a superb post-exercise meal.
3. **Stabilization of Blood Sugar**: The protein and fiber from included vegetables can assist in regulating blood sugar levels, rendering this dish suitable for individuals with insulin sensitivity or diabetes.
**Final Thoughts**
High-protein slow cooker lasagna represents a successful adaptation of a cherished classic, delivering a host of health benefits while maintaining wonderful taste. Its convenience, paired with a well-rounded nutritional composition, makes it an ideal option for those aiming to boost their diet with additional protein. Whether for weight management, muscle preservation, or simply a delightful meal, this dish stands out as a versatile and health-conscious choice.
Robust Chicken Stew Recipe
Chicken Soup
Preparation Time: 15 minutes Cooking Time: 45 minutes Total Duration: 1 hour Servings: 6
A delicious chicken soup loaded with various vegetables and herbs!
ingredients
- 2 tablespoons oil
- 2 tablespoons butter
- 1 pound boneless, skinless chicken breasts or thighs, chopped into small pieces
- 2 tablespoons flour (gluten-free for gluten-free)
- 1 cup onion, chopped
- 1 cup carrot, chopped
- 1 cup celery, chopped
- 2 tablespoons garlic, minced
- 2 teaspoons sage, minced (or 1 teaspoon dried)
- 2 teaspoons rosemary, minced (or 1 teaspoon dried)
- 2 teaspoons thyme, minced (or 1 teaspoon dried)
- 2 tablespoons flour (gluten-free for gluten-free)
- 6 cups chicken stock (link)
- 2 cups potatoes, chopped
- 2 bay leaves (optional)
- 1/2 cup heavy cream
- 1/4 cup grated parmigiano reggiano (parmesan cheese)
- 1 cup peas (optional)
- 1 tablespoon parsley, minced (optional)
- salt and pepper to taste
directions
- In a large saucepan over medium heat, heat the oil and melt the butter, then add the chicken and cook for about 8-10 minutes before removing from the pan.
- Introduce the onion, carrot, and celery, cooking until soft, approximately 10-15 minutes.
- Incorporate the garlic, sage, rosemary, and thyme, sprinkle in the flour, stir well, and cook for a minute.
- Pour in 1/2 cup of broth, using a spoon to deglaze the pan by scraping up any browned bits as the broth simmers.
- Combine the remaining broth, chicken, potatoes, and bay leaves, bring to a boil, lower the heat and simmer until the potatoes are cooked through, around 20 minutes.
- Discard the bay leaves, stir in the cream and parmesan, allowing the cheese to melt into the broth.
- Stir in the peas and parsley, adjust seasoning with salt and pepper, and savor!
Option: Skip the flour! It’s used for thickening the broth.
Option: Include 8 ounces of sliced mushrooms with the onions.
Option: Add 1 diced bell pepper with the onions.
Option: Mix in 1 tablespoon of tomato paste along with the garlic.
Option: Stir in 1/4 teaspoon of turmeric along with the broth.

Dishes Prepared in One Pan
**Fast and Simple One-Pan Meal Recipes for Hectic Evenings**
In the current whirlwind of life, carving out time to whip up a homemade dish can be difficult. With hectic timetables, particularly during the festive period, quick and simple meals that demand minimal cleanup are invaluable. One-pan or one-pot dishes are ideal for those evenings when you crave something tasty without dedicating hours in the kitchen. Below are some of the finest one-pan meal recipes that are not only straightforward but also deliciously satisfying.
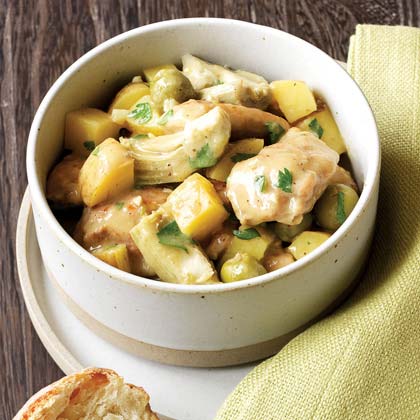
**1. One-Pan Lemon Herb Chicken and Vegetables**
This recipe features succulent chicken breasts paired with a variety of seasonal veggies, all infused with a refreshing lemon herb marinade. Just arrange everything on a baking sheet and roast until the chicken is fully cooked and the vegetables are soft. Pair with some crusty bread to soak up the delicious juices.
**2. Skillet Shrimp and Orzo**
In only 30 minutes, you can have a delightful seafood dish ready. Sauté shrimp with garlic and cherry tomatoes, then incorporate orzo pasta and chicken broth. Allow it to simmer until the orzo becomes tender. Finish with a dash of fresh parsley and a squeeze of lemon juice for a lively, zesty touch.
**3. One-Pot Beef and Mushroom Stroganoff**
This comforting favorite is simplified by preparing everything in one pot. Sauté ground beef with onions and garlic, then add mushrooms and beef broth. Mix in egg noodles and cook them in the savory mixture. Top with a spoonful of sour cream for that trademark creamy consistency.
**4. Slow Cooker Chicken Tortilla Soup**
Ideal for a chilly night, this soup is easy to make. Combine chicken breasts, chopped tomatoes, black beans, corn, and spices in a slow cooker. Let it simmer all day, and by mealtime, you’ll have a wholesome soup ready to be served with crispy tortilla strips and avocado slices.
**5. Grilled Sausage and Vegetable Foil Packets**
For a swift grilling choice, give these foil packets a try. Load each packet with sliced sausage, bell peppers, onions, and potatoes, seasoned with olive oil and your preferred spices. Close the packets and grill until everything is cooked perfectly. The outcome is a smoky, flavorful meal with minimal cleanup required.
**6. One-Pan Creamy Tuscan Salmon**
This sophisticated dish is surprisingly easy. Sear salmon fillets in a skillet, then remove and set them aside. In the same pan, prepare a creamy sauce with garlic, spinach, sun-dried tomatoes, and cream. Return the salmon to the pan to finish cooking in the sauce. Serve alongside pasta or rice for a complete meal.
**7. Oven-Baked Ratatouille**
A vegetarian treat, this dish showcases layers of sliced zucchini, eggplant, and tomatoes, all baked in a luscious tomato sauce. Garnish with herbs and bake until the vegetables are tender. This vibrant dish is not merely healthy but also visually appealing.
These one-pan recipes are ideal for those evenings when you require a quick and effortless meal without compromising on taste. Whether cooking for yourself or your family, these dishes are guaranteed to delight and make your nights a little less chaotic. Relish the simplicity and flavor of one-pan cooking!

Fluffy Mashed Potatoes Accompanied by Sweet Sautéed Cabbage
### Colcannon: The Ideal Dish for St. Patrick’s Day
Colcannon is an authentic Irish meal that blends creamy mashed potatoes with sweet cabbage and sautéed onions, creating the perfect comfort food. Although it is frequently linked to St. Patrick’s Day, this dish can be relished any time of the year when you desire something warm and inviting.
#### Flavor Profile
Colcannon features a buttery, savory taste with a touch of sweetness from the cooked cabbage and onions. This charming mix makes it a beloved choice for many.
#### Ingredient Swaps
If you wish to try something different, you can swap kale for cabbage. Nonetheless, cabbage is favored for its milder and sweeter flavor.
#### Serving Suggestions
Typically, colcannon is garnished with melted butter, which enhances its deep flavor. It pairs excellently with corned beef or glazed honey ham, rendering it a flexible side dish for numerous meals.
### Ingredient Notes and Swaps
– **Potatoes**: Opt for starchy baking potatoes such as Russet or Yukon Gold. After boiling, mash them with generous amounts of butter and cream. For extra creaminess, you might want to add sour cream or cream cheese.
– **Cabbage**: Green cabbage turns tender and delightful when sautéed in butter. Curly kale or savoy cabbage can serve as substitutes if preferred.
– **Onion**: Sautéed onions complement the mashed potatoes splendidly. You can utilize white onions, green onions, or even leeks for a distinctive flavor.
– **Butter & Bacon**: Although not traditional, including bacon can elevate the taste. If available, use bacon drippings to prepare the vegetables for an extra savory flavor.
– **Variations**: For a sweet variation, swap part of the potatoes with parsnips. Cooking the vegetables in bacon drippings and mixing in crispy bacon enhances richness.
### How to Prepare Colcannon
1. **Cook the Potatoes**: Boil the potatoes in salted water until tender enough to pierce with a fork, then drain.
2. **Mash the Potatoes**: Mash the drained potatoes with cream and butter.
3. **Sauté the Vegetables**: In a skillet, soften the onion, leeks, and cabbage in butter, seasoning as desired.
4. **Combine**: Mix the sautéed vegetables into the mashed potatoes and top with more butter.
Garnish with parsley, chives, or crispy bacon to enhance flavor.
### Tips for Perfect Colcannon
– Ensure the potatoes are fully drained to prevent a watery texture.
– Warm the cream before adding it to the potatoes for a creamier consistency.
– Mash gently to avoid a gluey texture; using a potato ricer can contribute to fluffiness.
– Chop cabbage into small pieces for uniform tenderness.
– Rinse leeks under water to eliminate any grit before cooking.
### What to Do with Leftover Colcannon
– **Storage**: Store leftovers in an airtight container in the refrigerator for 4 days or freeze for 2 months.
– **Reheating**: Reheat on the stovetop with a splash of cream to retain the creamy texture.
– **Creative Uses**: Utilize leftovers to top shepherd’s pie, create crispy potato patties, or mix with ground beef for a hearty meal.
### Conclusion
Colcannon is not just a side dish; it’s a comforting hug served on a plate. Whether you’re marking St. Patrick’s Day or simply seeking comfort food, this recipe is bound to delight. Savor the rich flavors and cozy textures of this classic Irish dish any day of the year!
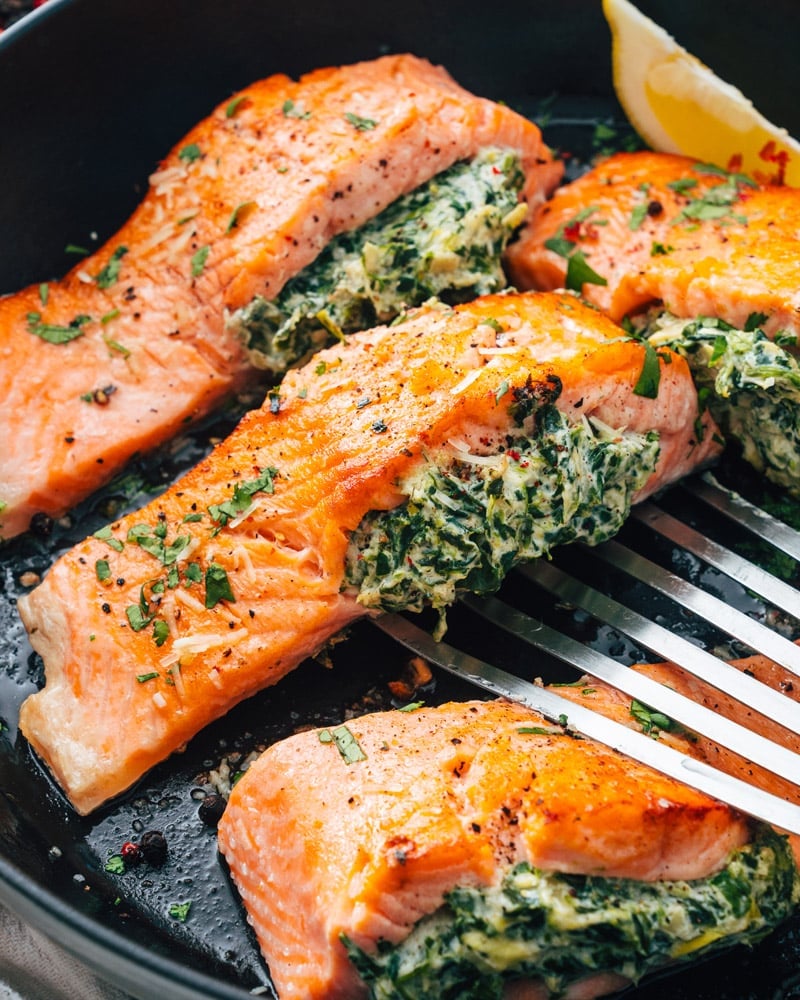
Salmon Stuffed with Spinach Filling
Alex & Sonja: The Culinary Team Behind A Couple Cooks
Introducing Alex and Sonja Overhiser, the energetic pair behind the beloved culinary platform, A Couple Cooks. As writers of two notable cookbooks, devoted parents, and a real-life couple who revel in cooking, Alex and Sonja have made a noteworthy contribution to the home cooking scene. Their adventure started in 2010 when they created A Couple Cooks to express their affection for uncomplicated, seasonal recipes and the happiness that comes from cooking together.
Throughout the years, A Couple Cooks has developed into a thorough resource for home chefs, providing thousands of unique recipes, valuable cooking advice, and useful meal planning suggestions. Every recipe is carefully formulated, trialed, and photographed by Alex and Sonja, guaranteeing that each dish meets their strict criteria for flavor and presentation. Their recipes are aimed not only at being tasty but also approachable, inviting individuals of all cooking abilities to attempt creating wholesome meals.
What distinguishes Alex and Sonja is their dedication to seasonal ingredients, which not only amplifies the taste of their meals but also promotes sustainable and eco-friendly cooking methods. They are convinced that cooking with seasonal produce leads to a more diverse and nutritious diet, and they aim to motivate their audience to adopt this philosophy in their own homes.
Beyond their online platform, Alex and Sonja have penned two cookbooks that further highlight their culinary knowledge and enthusiasm for home cooking. These publications are packed with a diverse range of recipes that suit various tastes and dietary requirements, making them invaluable tools for anyone eager to broaden their culinary skills.
As parents, Alex and Sonja recognize the difficulties of juggling a hectic family life while striving to prepare healthy, home-cooked meals. They frequently try out their recipes on their own children, ensuring that their dishes are not only nutritious but also approved by kids. This family-centric approach resonates with many of their followers, who value the practical and relatable aspect of their content.
Through A Couple Cooks, Alex and Sonja have cultivated a lively community of food lovers who share their enthusiasm for cooking and enjoying great meals. Their website serves as a gathering place for inspiration, learning, and connection, linking people from diverse backgrounds who are united by a passion for quality food.
Whether you are an experienced cook or at the beginning of your culinary adventure, Alex and Sonja’s A Couple Cooks provides an abundance of resources to help you create delightful meals and relish the cooking experience. With their support, you can uncover the joy of making simple, seasonal dishes that nourish both body and mind.

The Efficiency of High-Protein Slow Cooker Lasagna
**The Efficacy of High-Protein Slow Cooker Lasagna**
Lasagna, an iconic Italian meal, has long been a favorite in numerous homes for its deep flavors and delightful layers of pasta, cheese, and sauce. Yet, with the rising emphasis on health and nutrition, conventional recipes are being revised to align with dietary requirements. One such revision is the high-protein slow cooker lasagna, which merges convenience with health advantages. This article examines the efficacy of this dish in fulfilling dietary objectives and its influence on well-being.
**Health Advantages**
1. **Boosted Protein Consumption**: Protein is vital for muscle repair, development, and overall bodily functions. High-protein lasagna usually includes components like lean ground beef, turkey, or plant-based proteins such as lentils or tofu. Additionally, substituting cottage cheese or Greek yogurt for ricotta can elevate the protein levels.
2. **Well-Rounded Macronutrients**: By modifying the classic recipe, high-protein lasagna can provide a more well-balanced macronutrient profile. This equilibrium assists in sustaining energy levels and can facilitate weight management by promoting a sense of fullness.
3. **Abundant in Micronutrients**: Adding vegetables like spinach, zucchini, or bell peppers not only improves taste but also boosts the intake of essential vitamins and minerals. These nutrients are vital for sustaining immune health and overall wellness.
**Convenience and Preparation Method**
1. **Advantages of the Slow Cooker**: The slow cooker technique is celebrated for its ease. It allows for a hands-off culinary experience, perfect for those with busy lifestyles. Ingredients can be prepped ahead of time, and the slow cooking method enhances flavors while maintaining nutrients.
2. **Efficiency in Time**: While traditional lasagna demands lengthy preparation and supervision, the slow cooker variant streamlines the method. This approach is especially beneficial for individuals wanting a nutritious meal without spending countless hours in the kitchen.
**Health Considerations**
1. **Weight Control**: High-protein diets are frequently linked to weight loss and management due to their capacity to elevate feelings of fullness. Slow cooker lasagna, enriched with protein, can serve as a filling meal option that aids in appetite regulation.
2. **Muscle Preservation**: For those actively participating in fitness routines, preserving muscle mass is vital. The protein-dense nature of this lasagna supports muscle recovery and growth, making it a superb post-exercise meal.
3. **Stabilization of Blood Sugar**: The protein and fiber from included vegetables can assist in regulating blood sugar levels, rendering this dish suitable for individuals with insulin sensitivity or diabetes.
**Final Thoughts**
High-protein slow cooker lasagna represents a successful adaptation of a cherished classic, delivering a host of health benefits while maintaining wonderful taste. Its convenience, paired with a well-rounded nutritional composition, makes it an ideal option for those aiming to boost their diet with additional protein. Whether for weight management, muscle preservation, or simply a delightful meal, this dish stands out as a versatile and health-conscious choice.
Read More
Robust Chicken Stew Recipe
Chicken Soup
Preparation Time: 15 minutes Cooking Time: 45 minutes Total Duration: 1 hour Servings: 6
A delicious chicken soup loaded with various vegetables and herbs!
ingredients
- 2 tablespoons oil
- 2 tablespoons butter
- 1 pound boneless, skinless chicken breasts or thighs, chopped into small pieces
- 2 tablespoons flour (gluten-free for gluten-free)
- 1 cup onion, chopped
- 1 cup carrot, chopped
- 1 cup celery, chopped
- 2 tablespoons garlic, minced
- 2 teaspoons sage, minced (or 1 teaspoon dried)
- 2 teaspoons rosemary, minced (or 1 teaspoon dried)
- 2 teaspoons thyme, minced (or 1 teaspoon dried)
- 2 tablespoons flour (gluten-free for gluten-free)
- 6 cups chicken stock (link)
- 2 cups potatoes, chopped
- 2 bay leaves (optional)
- 1/2 cup heavy cream
- 1/4 cup grated parmigiano reggiano (parmesan cheese)
- 1 cup peas (optional)
- 1 tablespoon parsley, minced (optional)
- salt and pepper to taste
directions
- In a large saucepan over medium heat, heat the oil and melt the butter, then add the chicken and cook for about 8-10 minutes before removing from the pan.
- Introduce the onion, carrot, and celery, cooking until soft, approximately 10-15 minutes.
- Incorporate the garlic, sage, rosemary, and thyme, sprinkle in the flour, stir well, and cook for a minute.
- Pour in 1/2 cup of broth, using a spoon to deglaze the pan by scraping up any browned bits as the broth simmers.
- Combine the remaining broth, chicken, potatoes, and bay leaves, bring to a boil, lower the heat and simmer until the potatoes are cooked through, around 20 minutes.
- Discard the bay leaves, stir in the cream and parmesan, allowing the cheese to melt into the broth.
- Stir in the peas and parsley, adjust seasoning with salt and pepper, and savor!
Option: Skip the flour! It’s used for thickening the broth.
Option: Include 8 ounces of sliced mushrooms with the onions.
Option: Add 1 diced bell pepper with the onions.
Option: Mix in 1 tablespoon of tomato paste along with the garlic.
Option: Stir in 1/4 teaspoon of turmeric along with the broth.

Dishes Prepared in One Pan
**Fast and Simple One-Pan Meal Recipes for Hectic Evenings**
In the current whirlwind of life, carving out time to whip up a homemade dish can be difficult. With hectic timetables, particularly during the festive period, quick and simple meals that demand minimal cleanup are invaluable. One-pan or one-pot dishes are ideal for those evenings when you crave something tasty without dedicating hours in the kitchen. Below are some of the finest one-pan meal recipes that are not only straightforward but also deliciously satisfying.
**1. One-Pan Lemon Herb Chicken and Vegetables**
This recipe features succulent chicken breasts paired with a variety of seasonal veggies, all infused with a refreshing lemon herb marinade. Just arrange everything on a baking sheet and roast until the chicken is fully cooked and the vegetables are soft. Pair with some crusty bread to soak up the delicious juices.
**2. Skillet Shrimp and Orzo**
In only 30 minutes, you can have a delightful seafood dish ready. Sauté shrimp with garlic and cherry tomatoes, then incorporate orzo pasta and chicken broth. Allow it to simmer until the orzo becomes tender. Finish with a dash of fresh parsley and a squeeze of lemon juice for a lively, zesty touch.
**3. One-Pot Beef and Mushroom Stroganoff**
This comforting favorite is simplified by preparing everything in one pot. Sauté ground beef with onions and garlic, then add mushrooms and beef broth. Mix in egg noodles and cook them in the savory mixture. Top with a spoonful of sour cream for that trademark creamy consistency.
**4. Slow Cooker Chicken Tortilla Soup**
Ideal for a chilly night, this soup is easy to make. Combine chicken breasts, chopped tomatoes, black beans, corn, and spices in a slow cooker. Let it simmer all day, and by mealtime, you’ll have a wholesome soup ready to be served with crispy tortilla strips and avocado slices.
**5. Grilled Sausage and Vegetable Foil Packets**
For a swift grilling choice, give these foil packets a try. Load each packet with sliced sausage, bell peppers, onions, and potatoes, seasoned with olive oil and your preferred spices. Close the packets and grill until everything is cooked perfectly. The outcome is a smoky, flavorful meal with minimal cleanup required.
**6. One-Pan Creamy Tuscan Salmon**
This sophisticated dish is surprisingly easy. Sear salmon fillets in a skillet, then remove and set them aside. In the same pan, prepare a creamy sauce with garlic, spinach, sun-dried tomatoes, and cream. Return the salmon to the pan to finish cooking in the sauce. Serve alongside pasta or rice for a complete meal.
**7. Oven-Baked Ratatouille**
A vegetarian treat, this dish showcases layers of sliced zucchini, eggplant, and tomatoes, all baked in a luscious tomato sauce. Garnish with herbs and bake until the vegetables are tender. This vibrant dish is not merely healthy but also visually appealing.
These one-pan recipes are ideal for those evenings when you require a quick and effortless meal without compromising on taste. Whether cooking for yourself or your family, these dishes are guaranteed to delight and make your nights a little less chaotic. Relish the simplicity and flavor of one-pan cooking!
Read More
Fluffy Mashed Potatoes Accompanied by Sweet Sautéed Cabbage
### Colcannon: The Ideal Dish for St. Patrick’s Day
Colcannon is an authentic Irish meal that blends creamy mashed potatoes with sweet cabbage and sautéed onions, creating the perfect comfort food. Although it is frequently linked to St. Patrick’s Day, this dish can be relished any time of the year when you desire something warm and inviting.
#### Flavor Profile
Colcannon features a buttery, savory taste with a touch of sweetness from the cooked cabbage and onions. This charming mix makes it a beloved choice for many.
#### Ingredient Swaps
If you wish to try something different, you can swap kale for cabbage. Nonetheless, cabbage is favored for its milder and sweeter flavor.
#### Serving Suggestions
Typically, colcannon is garnished with melted butter, which enhances its deep flavor. It pairs excellently with corned beef or glazed honey ham, rendering it a flexible side dish for numerous meals.
### Ingredient Notes and Swaps
– **Potatoes**: Opt for starchy baking potatoes such as Russet or Yukon Gold. After boiling, mash them with generous amounts of butter and cream. For extra creaminess, you might want to add sour cream or cream cheese.
– **Cabbage**: Green cabbage turns tender and delightful when sautéed in butter. Curly kale or savoy cabbage can serve as substitutes if preferred.
– **Onion**: Sautéed onions complement the mashed potatoes splendidly. You can utilize white onions, green onions, or even leeks for a distinctive flavor.
– **Butter & Bacon**: Although not traditional, including bacon can elevate the taste. If available, use bacon drippings to prepare the vegetables for an extra savory flavor.
– **Variations**: For a sweet variation, swap part of the potatoes with parsnips. Cooking the vegetables in bacon drippings and mixing in crispy bacon enhances richness.
### How to Prepare Colcannon
1. **Cook the Potatoes**: Boil the potatoes in salted water until tender enough to pierce with a fork, then drain.
2. **Mash the Potatoes**: Mash the drained potatoes with cream and butter.
3. **Sauté the Vegetables**: In a skillet, soften the onion, leeks, and cabbage in butter, seasoning as desired.
4. **Combine**: Mix the sautéed vegetables into the mashed potatoes and top with more butter.
Garnish with parsley, chives, or crispy bacon to enhance flavor.
### Tips for Perfect Colcannon
– Ensure the potatoes are fully drained to prevent a watery texture.
– Warm the cream before adding it to the potatoes for a creamier consistency.
– Mash gently to avoid a gluey texture; using a potato ricer can contribute to fluffiness.
– Chop cabbage into small pieces for uniform tenderness.
– Rinse leeks under water to eliminate any grit before cooking.
### What to Do with Leftover Colcannon
– **Storage**: Store leftovers in an airtight container in the refrigerator for 4 days or freeze for 2 months.
– **Reheating**: Reheat on the stovetop with a splash of cream to retain the creamy texture.
– **Creative Uses**: Utilize leftovers to top shepherd’s pie, create crispy potato patties, or mix with ground beef for a hearty meal.
### Conclusion
Colcannon is not just a side dish; it’s a comforting hug served on a plate. Whether you’re marking St. Patrick’s Day or simply seeking comfort food, this recipe is bound to delight. Savor the rich flavors and cozy textures of this classic Irish dish any day of the year!
Read More
Salmon Stuffed with Spinach Filling
Alex & Sonja: The Culinary Team Behind A Couple Cooks
Introducing Alex and Sonja Overhiser, the energetic pair behind the beloved culinary platform, A Couple Cooks. As writers of two notable cookbooks, devoted parents, and a real-life couple who revel in cooking, Alex and Sonja have made a noteworthy contribution to the home cooking scene. Their adventure started in 2010 when they created A Couple Cooks to express their affection for uncomplicated, seasonal recipes and the happiness that comes from cooking together.
Throughout the years, A Couple Cooks has developed into a thorough resource for home chefs, providing thousands of unique recipes, valuable cooking advice, and useful meal planning suggestions. Every recipe is carefully formulated, trialed, and photographed by Alex and Sonja, guaranteeing that each dish meets their strict criteria for flavor and presentation. Their recipes are aimed not only at being tasty but also approachable, inviting individuals of all cooking abilities to attempt creating wholesome meals.
What distinguishes Alex and Sonja is their dedication to seasonal ingredients, which not only amplifies the taste of their meals but also promotes sustainable and eco-friendly cooking methods. They are convinced that cooking with seasonal produce leads to a more diverse and nutritious diet, and they aim to motivate their audience to adopt this philosophy in their own homes.
Beyond their online platform, Alex and Sonja have penned two cookbooks that further highlight their culinary knowledge and enthusiasm for home cooking. These publications are packed with a diverse range of recipes that suit various tastes and dietary requirements, making them invaluable tools for anyone eager to broaden their culinary skills.
As parents, Alex and Sonja recognize the difficulties of juggling a hectic family life while striving to prepare healthy, home-cooked meals. They frequently try out their recipes on their own children, ensuring that their dishes are not only nutritious but also approved by kids. This family-centric approach resonates with many of their followers, who value the practical and relatable aspect of their content.
Through A Couple Cooks, Alex and Sonja have cultivated a lively community of food lovers who share their enthusiasm for cooking and enjoying great meals. Their website serves as a gathering place for inspiration, learning, and connection, linking people from diverse backgrounds who are united by a passion for quality food.
Whether you are an experienced cook or at the beginning of your culinary adventure, Alex and Sonja’s A Couple Cooks provides an abundance of resources to help you create delightful meals and relish the cooking experience. With their support, you can uncover the joy of making simple, seasonal dishes that nourish both body and mind.
Read More
The Definitive Handbook to the Top 10 Strawberry Cocktails
Alex & Sonja: The Culinary Partners Behind A Couple Cooks
Introducing Alex and Sonja Overhiser, the energetic husband-and-wife duo who have transformed their love for cooking into a flourishing online community. As the creators of two celebrated cookbooks, Alex and Sonja have committed their lives to spreading the joy of cooking to others. Their adventure began in 2010 with the establishment of the A Couple Cooks website, a platform that has evolved into a key destination for straightforward, seasonal recipes and culinary inspiration.
As busy parents, Alex and Sonja are acutely aware of the difficulties in preparing nutritious, delicious meals amidst a fast-paced lifestyle. This real-world experience drives their mission to create approachable recipes that appeal to families and individuals. Every dish they design serves as a reflection of their dedication to ease and flavor, ensuring that home cooks of any skill level can relish the process of crafting healthy meals.
What distinguishes A Couple Cooks is the personal flair that Alex and Sonja infuse into their content. Each recipe is not only created but also photographed by the couple, offering an authentic insight into their culinary journeys. Their children are integral to the testing process, ensuring that every dish is approved by kids and suitable for families.
In addition to recipes, Alex and Sonja provide a plethora of cooking tips and meal planning suggestions, empowering their audience to adopt a more purposeful approach to food. Whether mastering a new technique or exploring a new ingredient, their advice encourages home cooks to broaden their culinary experiences.
In a world where convenience frequently overshadows quality, Alex and Sonja advocate for thoughtful cooking and dining. Their efforts through A Couple Cooks not only honor the craft of meal preparation but also cultivate a sense of community among food lovers around the globe. As they continue to motivate others with their creativity and enthusiasm, Alex and Sonja Overhiser remain cherished figures in the culinary world.
Read More
Easy Tuscan Kale Dish
This recipe for Tuscan kale results in soft, sautéed kale infused with garlic! Also known as Lacinato or dinosaur kale, it serves as a quick and simple side dish.
Once you begin cooking with Tuscan kale, you won’t want to switch back! This Italian type of kale boasts a sweeter, milder taste and is simpler to prepare. As it’s now quite accessible in supermarkets, I always suggest starting with this variety.
Here’s a way to make it taste utterly delicious: sauté it with olive oil and crushed garlic cloves for just a few minutes in a heated pan. Indeed, Alex and I have been purchasing large bundles of Tuscan kale weekly just to make this. Here’s how to prepare Tuscan kale: along with a few additional recipes to enjoy it!
What Is Tuscan Kale?
Tuscan kale is an Italian type featuring a dark green hue and a mild flavor. You might also see it referred to as Lacinato kale, dinosaur kale, black kale, or cavolo nero (which translates to black cabbage in Italian). Why is it called dinosaur kale? Its “scaly” leaves bear a resemblance to dinosaur skin! The leaves are very dark green and flat, in contrast to curly kale which has frilly, vibrant green leaves.
The taste of Tuscan kale is gentler and sweeter than that of curly kale, which can have a bitter and spicy flavor profile. Tuscan kale is simpler to incorporate into recipes as it’s less bitter, and its stems are softer than those of the curly type.
How to Cook Tuscan Kale
One reason I keep making this Tuscan kale frequently is due to its simplicity. Tuscan kale takes a mere 3 minutes to cook! There are a few tips for this recipe that elevate the flavor. Here’s how to sauté kale in under 10 minutes:
1. Chop: Remove the stems and cut the kale into bite-size pieces.
2. Sauté for 3 minutes: Heat olive oil over medium-high heat in a large skillet. Add crushed garlic cloves at the same time as the kale, which imparts a lovely subtle flavor. Sauté the kale and garlic for about 3 minutes, stirring often, until the leaves are wilted and bright green.
3. Season: Take it off the heat and add salt and pepper. That’s all! Perfectly sautéed Tuscan kale that pairs wonderfully with any meal.
5 Star Reader Review
⭐⭐⭐⭐⭐ “This was so good and so easy! I’ll definitely make this my go-to recipe”
Mix-ins and Variations
This sautéed Tuscan kale is delightful on its own: but here are a few ideas to enhance it!
– Toasted pine nuts: Pine nuts are often used in Italian dishes as a topping. Although they’re somewhat pricey, they provide a nutty flavor that’s hard to replicate! Toasted pine nuts add a touch of elegance.
– Shredded Parmesan or Pecorino cheese: Just a bit of aged cheese adds a special touch! Pecorino Romano cheese is our favorite: and a small amount goes far. It delivers a strong savory, salty flavor.
You can enjoy this Tuscan kale as a side dish, or include it in a main course! Add it to a grain bowl with grains like quinoa or farro, a protein such as chickpeas, and a lemon tahini sauce.
More Tuscan Kale Recipes
Here are several more ways I love to enjoy this kale variety:
1. Sautéed Tuscan Kale: The taste of this kale is so delightful, you’ll want to prepare it every day. It takes just 10 minutes to transform Tuscan kale into a side dish you’ll crave.
2. Tuscan Kale Salad: This Tuscan kale salad has the ability to change the minds of those who dislike kale. It is enveloped in a lemony, garlicky Parmesan dressing that’s absolutely scrumptious.
3. Kale Quinoa Salad: This kale quinoa salad is ideal for a healthy lunch or side dish! It’s simple to create and keeps well in the fridge for several days. Combined with chickpeas, bell peppers, and quinoa, they’re dressed in a tangy sauce.
4. Kale Pesto: Did you know Tuscan kale can be used to make pesto? Blend that leafy green with Parmesan cheese, garlic, nuts, and olive oil to create a savory, vibrant green puree that packs a spicy punch.
5. Ribollita (Tuscan Vegetable Stew): Ribollita is an Italian vegetable stew traditionally thickened with bread as a method to utilize stale crusts. It simmers gently so that the flavors meld together beautifully.
6. Grilled Tuscan Kale: This grilled kale emerges crispy and charred, with a smoky flavor. It’s ideal for placing on a grill rack while cooking a main dish or other vegetables. It

7-Day Nutritious Meal Schedule for March 2-8
**7-Day Nutritious Meal Schedule for March 2-8**
Upholding a well-balanced diet is crucial for overall wellness and vitality. As we shift from winter to spring, it’s an ideal time to revamp our meal strategies using seasonal produce that is both wholesome and tasty. Below is a 7-day nutritious meal schedule for March 2-8, crafted to deliver a mix of nutrients and tastes.
**Day 1: Monday**
– **Breakfast:** Overnight oats prepared with almond milk, chia seeds, sliced bananas, and a hint of cinnamon.
– **Lunch:** Grilled chicken salad featuring mixed greens, cherry tomatoes, cucumber, avocado, and a lemon-tahini dressing.
– **Dinner:** Baked salmon accompanied by quinoa and steamed asparagus.
**Day 2: Tuesday**
– **Breakfast:** Greek yogurt paired with mixed berries and a handful of granola.
– **Lunch:** Lentil soup with carrots, celery, and spinach, served alongside whole-grain bread.
– **Dinner:** Stir-fried tofu with broccoli, bell peppers, and brown rice.
**Day 3: Wednesday**
– **Breakfast:** Smoothie made with spinach, pineapple, banana, and coconut water.
– **Lunch:** Turkey and hummus wrap filled with lettuce, tomatoes, and cucumbers in a whole-wheat tortilla.
– **Dinner:** Quinoa-stuffed bell peppers containing black beans, corn, and diced tomatoes.
**Day 4: Thursday**
– **Breakfast:** Whole-grain toast topped with avocado, poached egg, and a dash of chili flakes.
– **Lunch:** Chickpea salad composed of cherry tomatoes, red onion, parsley, and a lemon-olive oil dressing.
– **Dinner:** Grilled shrimp tacos served with cabbage slaw and a side of black bean salad.
**Day 5: Friday**
– **Breakfast:** Oatmeal enhanced with sliced almonds, dried cranberries, and a drizzle of honey.
– **Lunch:** Spinach and feta cheese omelet served with a side of mixed fruit.
– **Dinner:** Baked chicken breast alongside roasted sweet potatoes and green beans.
**Day 6: Saturday**
– **Breakfast:** Whole-grain pancakes garnished with fresh strawberries and a dollop of Greek yogurt.
– **Lunch:** Quinoa and roasted vegetable bowl finished with a balsamic glaze.
– **Dinner:** Zucchini noodles topped with marinara sauce and turkey meatballs.
**Day 7: Sunday**
– **Breakfast:** Chia seed pudding enhanced with mango slices and coconut flakes.
– **Lunch:** Caprese salad featuring fresh mozzarella, tomatoes, basil, and balsamic reduction.
– **Dinner:** Grilled vegetable skewers served with a side of couscous and lemon-herb chicken.
This meal schedule features a variety of proteins, whole grains, and fresh produce to guarantee a comprehensive diet. Adjust portion sizes and ingredients according to individual dietary preferences and requirements. Savor the seasonal flavors while nourishing your body!
Read More
Easy and Tasty Black Bean Tacos Recipe
This tasty black bean tacos recipe requires only 15 minutes, providing a quick and effortless dinner option that everyone will enjoy! Tailor your toppings for plenty of variations. Suitable for gluten-free, vegan, dairy-free, and vegetarian diets.
Searching for those rare recipes that are nutritious, simple, and delectable? Our latest favorite is these straightforward black bean tacos! We designed this recipe to be entirely adaptable based on your dietary needs and the time you have. It highlights our 5-minute black beans, a swift taco filling idea that’s packed with flavor in just a few moments.
Finish it off with all the premier taco toppings: corn, avocado, pickled onions, and a dash of feta cheese. If time permits, we adore it with vibrant cilantro lime sauce or avocado sauce!
5 Star Reader Reviews
⭐⭐⭐⭐⭐ “This was incredibly easy and simply delicious! The ideal summer evening meal. I used the box of black beans from 365 Whole Foods brand, and they were very soft.” -Lauren
⭐⭐⭐⭐⭐ “These are fantastic! We made it with the cilantro lime sauce, and they created excellent tacos! We also tried the feta cheese and were amazed at how good the feta was on tacos!” -Annie
Tips for Black Bean Tacos
These black bean tacos are straightforward to prepare and accommodate any toppings you desire! The secret lies in the easy black bean filling. Here are several tips for crafting these speedy black bean tacos:
– Mince the garlic, then sauté for 30 seconds in butter and olive oil. The blend of these two cooking fats provides the best flavor, though you can use all olive oil if preferred!
– Incorporate drained but un-rinsed black beans and cook for 3 to 4 minutes. Here’s the trick: a small amount of the canned liquid will remain on the beans, creating a thick sauce for the tacos.
– Note: different brands of black beans vary. Some canned black beans tend to be more tender than others. We recommend using a brand that’s very soft rather than a firmer variety. You may need to experiment to find your favorite!
Customizing The Toppings
Once you have the black bean filling ready, it’s time to add toppings! We’ve compiled our favorite toppings in the recipe below. You can tailor them to your tastes and dietary needs, but keep the following in mind:
– Crunchy vegetables are essential. Since black beans have a soft texture, you need a crunchy contrast. We used chopped romaine and corn.
– You’ll need a flavorful sauce. A good sauce is crucial for a scrumptious taco! Utilizing a mix of store-bought taco sauce or salsa with sour cream is the quickest choice. If you have a few extra minutes, whip up Cilantro Lime Sauce or Avocado Sauce.
– Cheese is optional but recommended. We enjoy adding a sprinkle of feta crumbles or queso fresco; shredded cheese is also a great option.
– Add additional vegetables. I love it with avocado and the zesty flavor of pickled red onions, prepped in advance. A few sliced jalapeño peppers are also lovely.
– Incorporate sweet potatoes. If you plan ahead, add roasted sweet potatoes for an even tastier taco! Check out my Sweet Potato Black Bean Tacos.
A Few Taco Sauces
There are many other sauce options available for these tacos! Here are some additional excellent choices sorted by timing and dietary preferences:
More simple taco recipes? Try our Refried Bean Tacos, Mushroom Tacos, Vegan Street Tacos, or Egg Tacos! Or explore Tex Mex with Taco Salad, Vegan Taco Salad, or Taco Soup.
Tip: Warm The Tortillas
A key tip for black bean tacos: warm your tortillas! There’s nothing worse than a taco with a tough, cold tortilla. Here’s how to warm tortillas like an expert:
– Hold them over the flame of a gas burner (preferred!). The best method? Place each tortilla directly on a gas burner for a few seconds on each side. It lightly chars the edges and warms the tortillas. Then transfer them to a tortilla warmer!
– Alternatively, warm them in the oven. If you lack a gas burner, you can warm them in the oven. Read How to Warm Tortillas.
Dietary Notes
This black bean tacos recipe is vegetarian, vegan, plant-based, dairy-free, and gluten-free. It’s simple to modify these black bean tacos for different diets! Here’s what to consider:
– For gluten-free, opt for corn tortillas. There are also numerous gluten-free tortilla options available today, such as cassava, sweet potato, and more. Check your local supermarket!
– For vegan, use vegan toppings. Use all olive oil for the black beans and leave out the cheese topping. Opt for a vegan sauce like Cilantro Sauce or Chipotle Sauce.
Black Bean Tacos (15 Minute Meal!)
This tasty black bean tacos recipe takes just
Read More
Slow Cooker Shepherd’s Pie with Tasty Gravy
# Slow Cooker Shepherd’s Pie: A Heartwarming Comfort Food Meal
This slow cooker shepherd’s pie is an essential dish to try, offering a hands-off, heartwarming comfort food meal. It’s filled with sautéed ground beef, assorted vegetables, and a savory gravy, all nestled beneath a generous layer of mashed potatoes. Ideal for hectic days and cold evenings, this recipe is not only fulfilling but also perfect for leftovers.
## Reasons to Make It
This shepherd’s pie is a genuine all-in-one dish that shines on busy days, cold nights, and as leftovers. The slow cooker provides a no-fuss cooking method, making preparation and enjoyment a breeze.
## Necessary Tools
– A large frying pan
– A whisk
– A slow cooker with a 4 to 6-quart capacity
– A spoon or spatula
## Method
Allow the shepherd’s pie to rest prior to serving. This resting phase enables the sauce to thicken into a rich gravy and facilitates easier scooping.
## Time-Saving Hint
Utilizing store-bought mashed potatoes and frozen vegetables keeps prep fast and simple, making this dish even more user-friendly.
## Essential Ingredients
– **Ground Beef**: While classic shepherd’s pie traditionally features lamb, ground beef is frequently used and delivers a robust flavor. Opt for lean cuts and drain any excess grease.
– **Vegetables**: Incorporate a blend of frozen peas, corn, green beans, and carrots for a traditional and vibrant meal.
– **Sauce**: A blend of beef broth, brown gravy mix, Worcestershire sauce, tomato paste, garlic powder, thyme, and cornstarch crafts a delicious gravy that thickens while cooking.
– **Mashed Potatoes**: Use sturdy, prepared mashed potatoes to maintain their form on top. Slightly warm them for easy spreading.
## Adaptations
– **Potato Topping**: Replace mashed potatoes with sweet potato mash, add shredded cheddar for a cheesy layer, or opt for a thick cauliflower mash for a lighter alternative.
– **Mix-ins**: Incorporate mushrooms with the browned meat for an added savory depth.
## Simple Steps for Slow Cooker Shepherd’s Pie
1. In a frying pan, brown the ground beef mixture and transfer it to the slow cooker.
2. Layer with vegetables and pour the prepared sauce mixture over them.
3. Evenly spread the mashed potatoes on top and cook.
Allow it to rest before serving to ensure the gravy thickens for easier serving.
## Leftovers You’ll Appreciate
– Let leftovers cool, then store in an airtight container in the fridge for up to 4 days or in the freezer for up to 3 months. Freezing in single servings permits quick reheating.
– Thaw in the refrigerator overnight, then reheat in the microwave or oven at 350°F until thoroughly warmed, keeping it covered to avoid drying out.
– To prepare in advance, assemble layers the night before, refrigerate, and cook the following day.
This slow cooker shepherd’s pie isn’t merely a dish; it’s a comforting experience that warms the spirit and pleases the taste buds. Share this delightful recipe with family and friends, and relish the cozy flavors it adds to your dining experience.
Read More